React项目Travis CI持续集成

使用Travis CI 持续集成部署开源项目

Travis CIGithub的好基友,是一个CI/CD的免费工具。可以自动化的进行项目的测试、打包等。不同于本机运行的JenkinsTravis提供了云服务器来帮助我们完成自动化流程。

前置工作

  • 一个Github项目
  • 注册Travis CI,使用Github账号授权即可

步骤

1. 使用Github Pages服务

  • 如果是Create-React-App的话,package.json添加homepage字段
1
2
3
4
5
6
"private": false,
"homepage": "./",
"repository": {
"type": "git",
"url": "https://github.com/Shirtiny/SubEditor"
},
  • 安装gh-pages
1
2
#yarn add gh-pages -D
npm install gh-pages -D
  • 设置scripts
1
2
3
4
5
6
7
8
"scripts": {
"start": "react-scripts start",
"build": "react-scripts build(你的dist目录)",
"test": "react-scripts test",
"eject": "react-scripts eject",
"predeploy": "npm run build",
"deploy": "gh-pages -d build(你的dist目录)"
},
  • 自定域名,在gh-pages分支根目录,添加CNAME,例如自定域名subeditor.js.org
1
subeditor.js.org

最后打开Github pages服务,选择使用gh-pages分支。

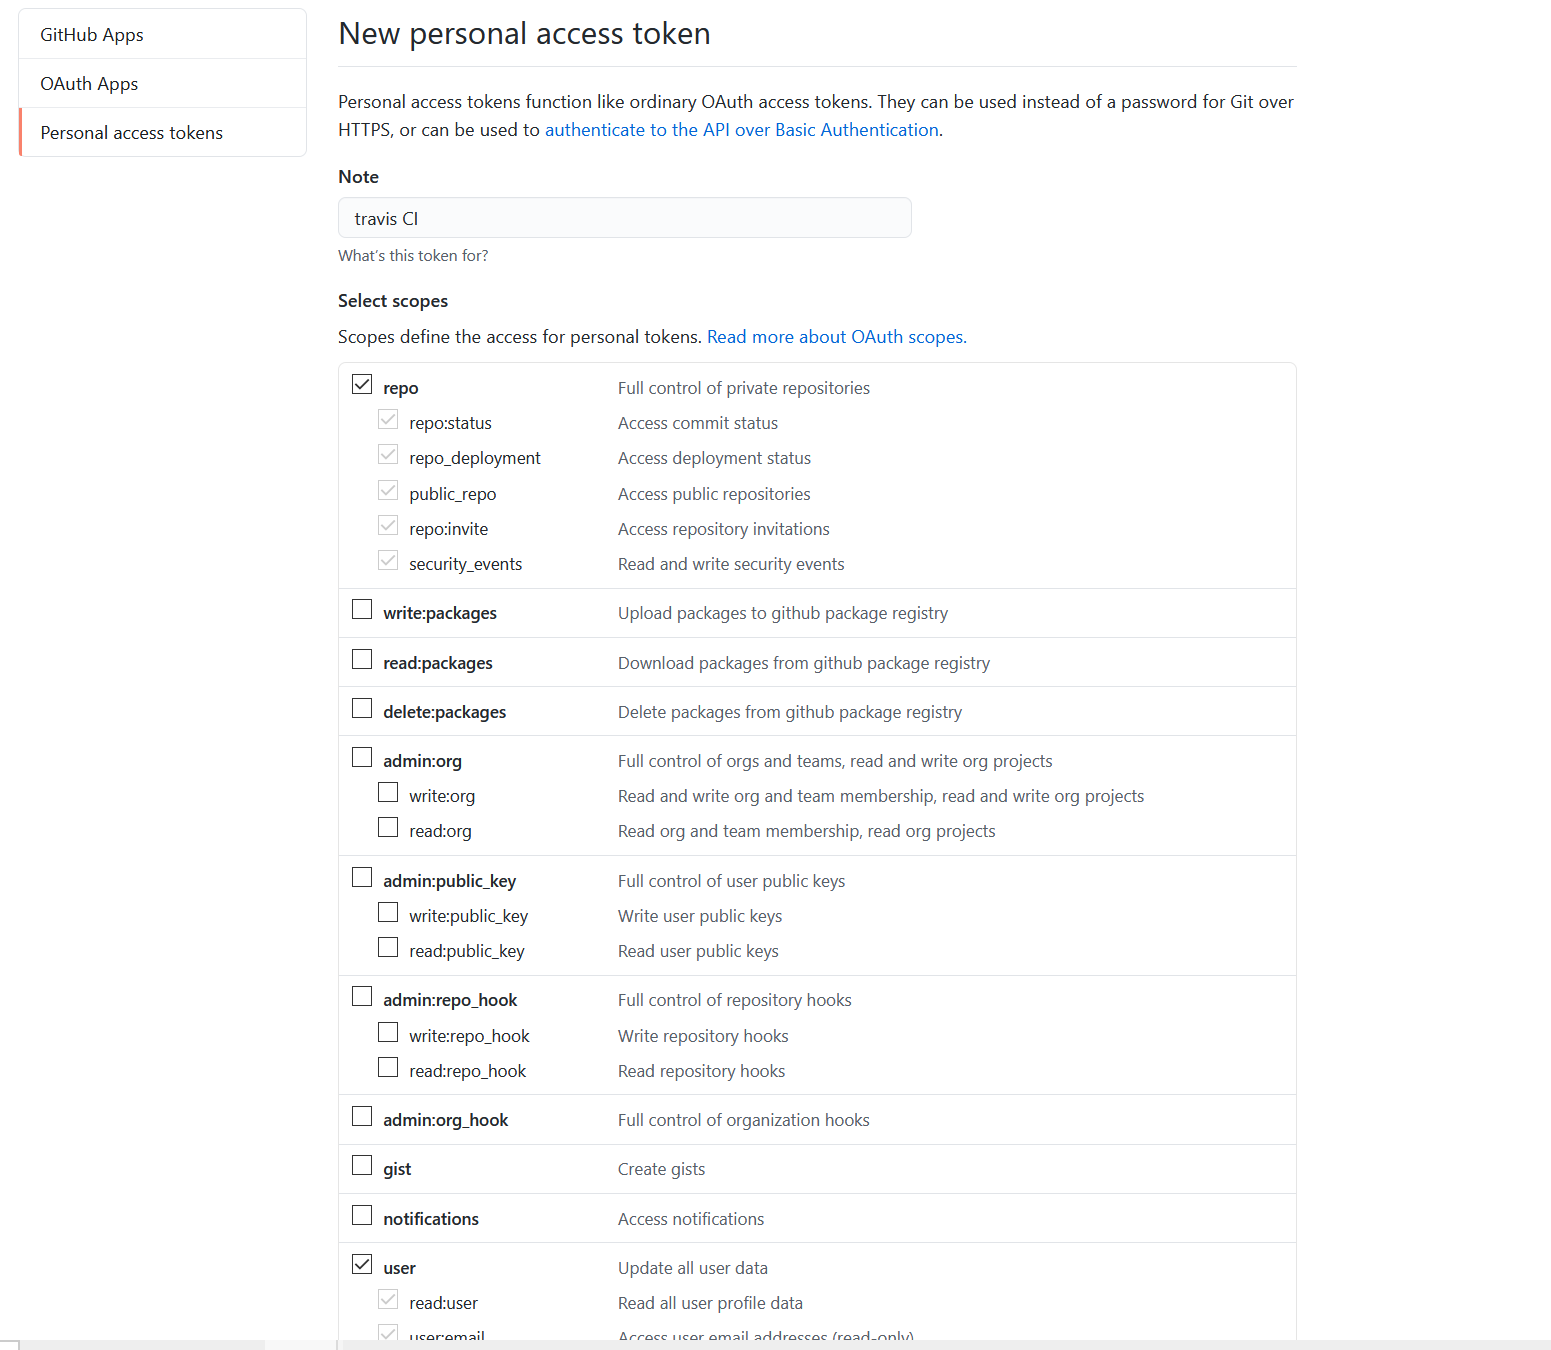
2. 创建GitHub Access Token

这里使用了Github pages服务,需要push内容到仓库,需要提供 Access Token 来授权。

前往:GitHub->Settings->Developer Settings->Personal access tokens

  • 勾选repo、user,然后点击Generate Token即可。记住token,后面会用到
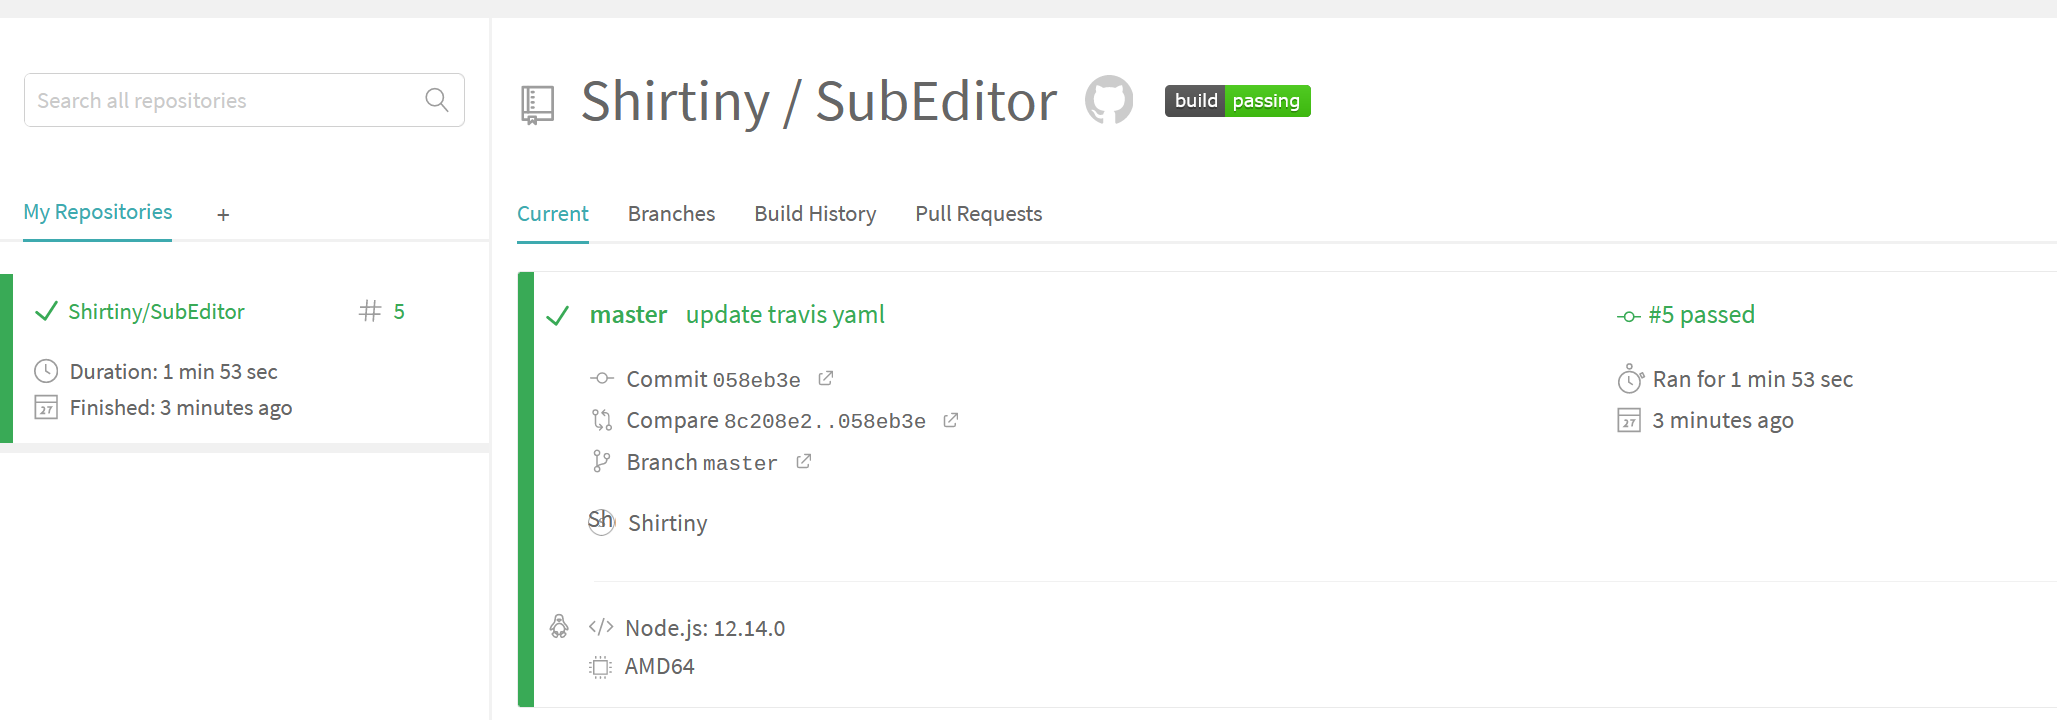
使用Travis CI

  • 注册Travis CI完成后,点击左侧加号新建项目,搜索你的项目名
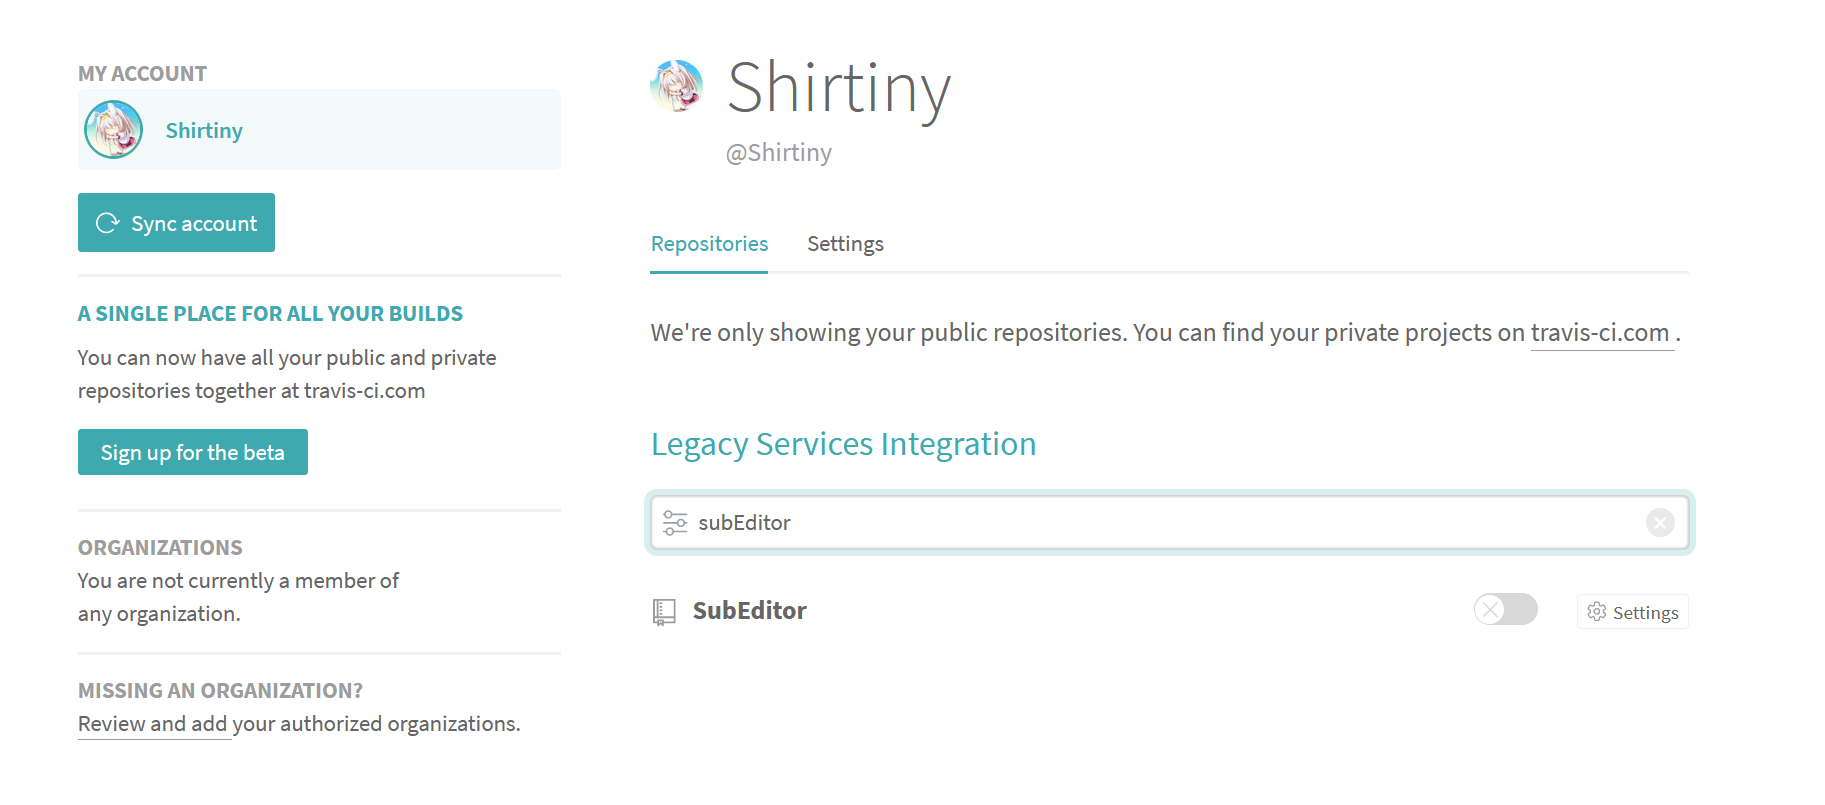
  • 点击开关开启对项目的监控

  • 点击Setting,在此处设置环境变量GithubToken,值为刚刚的token。输入完毕后点击Add
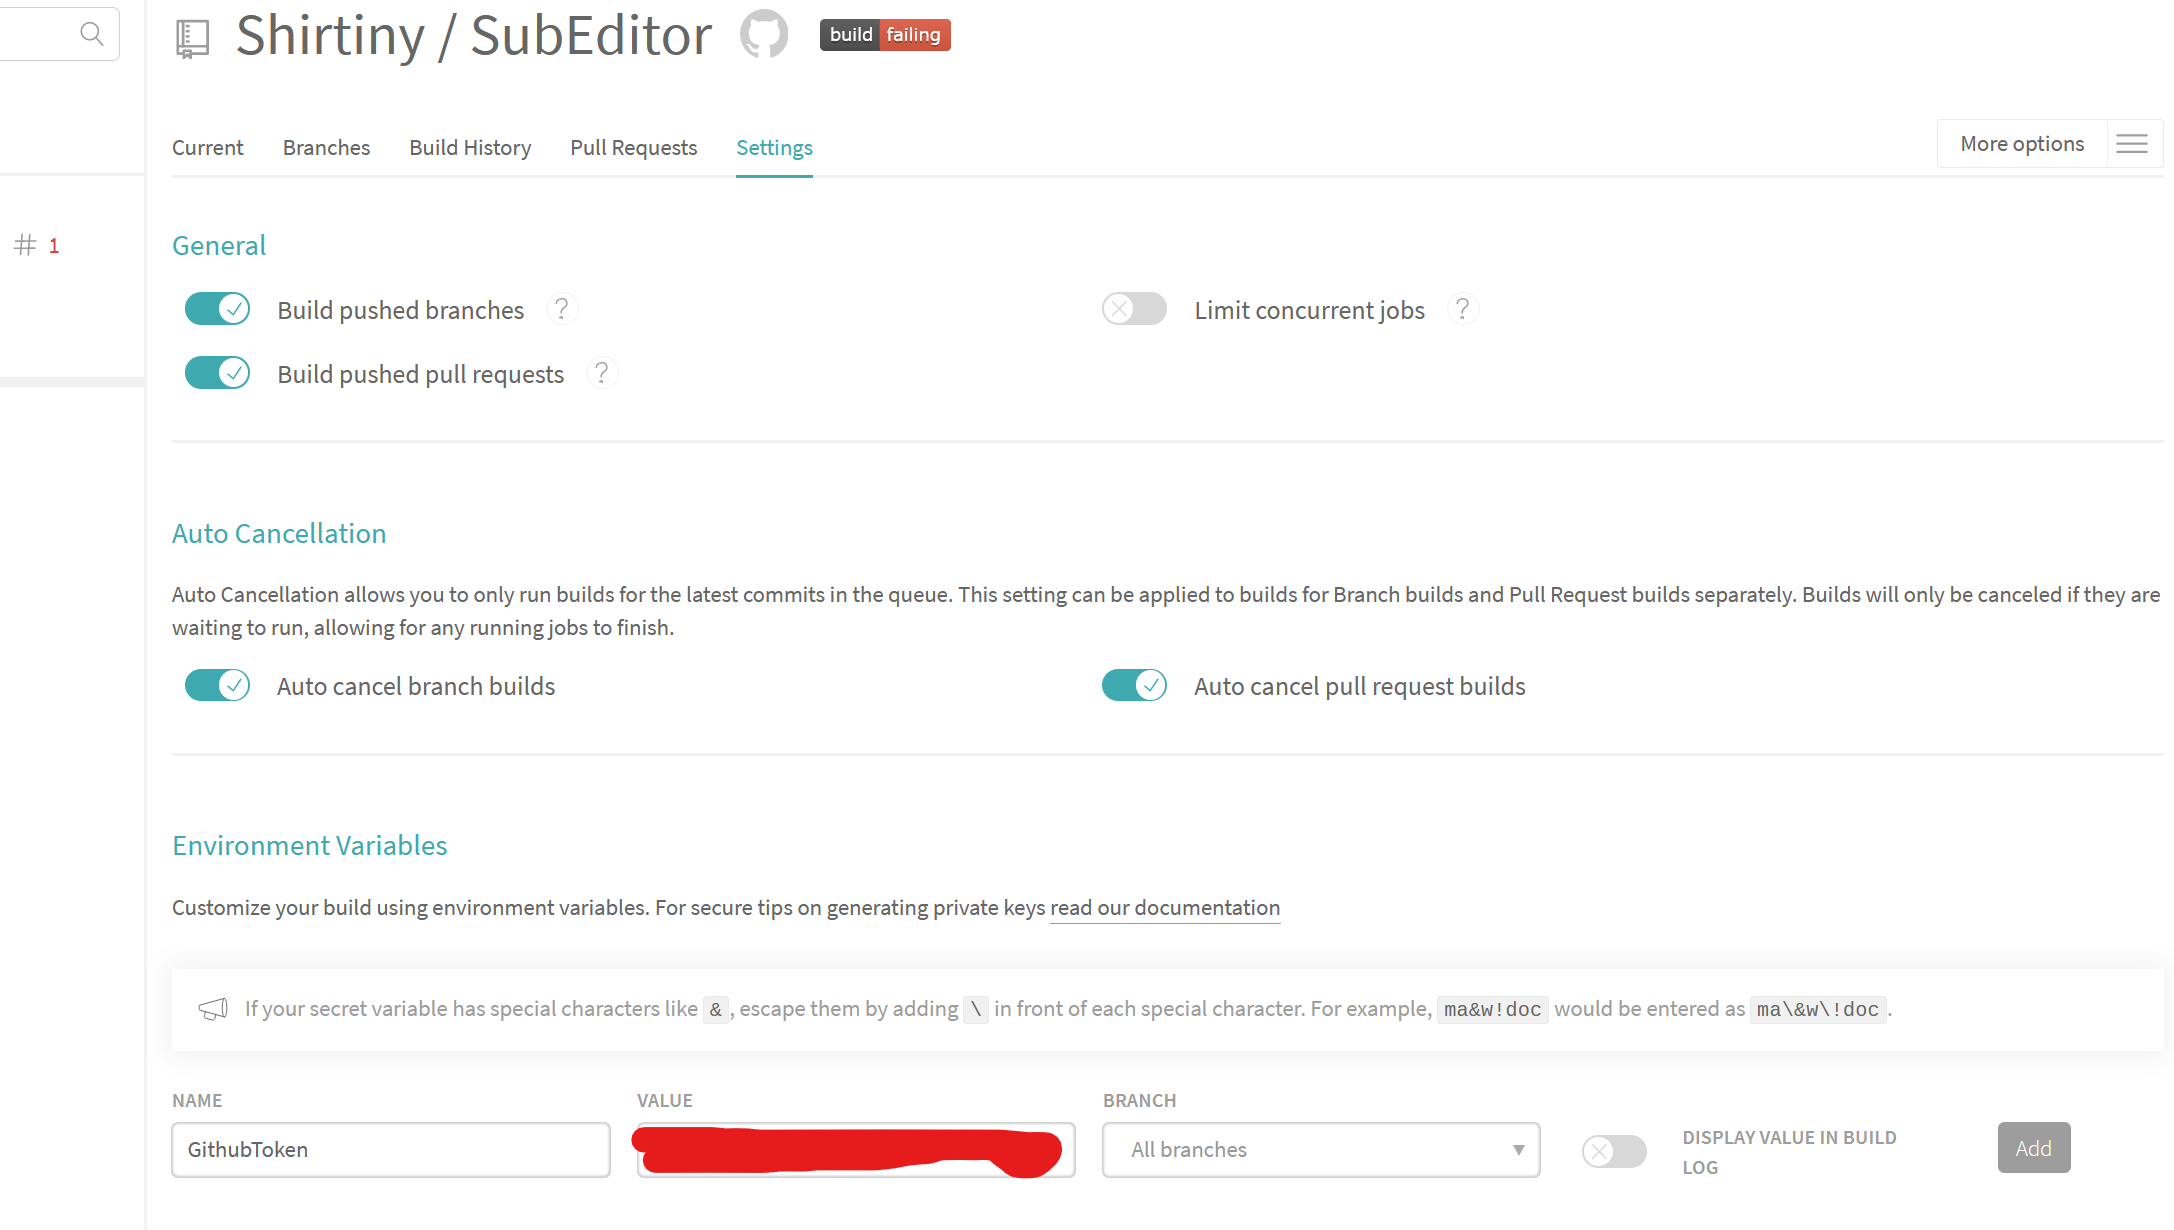
Github用户名

Github邮箱

Github仓库名

  • 在项目根目录添加文件.travis.yml,内容为:
1
2
3
4
5
6
7
8
9
10
11
12
13
14
15
16
17
18
19
20
language: node_js
# node版本 node -v
node_js: "12.14.0"
#缓存依赖
cache:
directories:
- node_modules
install:
- npm i
before_script:
- git config user.name "${UserName}"
- git config user.email "${UserEmail}"
- git remote rm origin
- git remote add origin https://${UserName}:${GithubToken}@github.com/${RepName}
- git remote -v
script: npm run deploy
# 只有指定的分支提交时才会运行脚本
branches:
only:
- master

Travis CI的一次构建分两个步骤:

  1. install安装,安装任何所需的依赖
  2. script脚本,运行构建脚本

Travis CI提供了一些构建生命周期的“钩子”

一个完整的 Travis CI 构建生命周期:

  1. OPTIONAL Install apt addons
  2. OPTIONAL Install cache components
  3. before_install
  4. install
  5. before_script
  6. script
  7. OPTIONAL before_cache(for cleaning up cache)
  8. after_success or after_failure
  9. OPTIONAL before_deploy
  10. OPTIONAL deploy
  11. OPTIONAL after_deploy
  12. after_script

before_installbefore_script之前,或者after_script之后,都可以运行自定义命令,详细资料可参考官方文档:Job Lifecycle

还有个可以参考,这样来保留git日志:

1
2
3
4
5
6
7
8
9
10
11
12
13
14
15
16
17
18
19
20
21
22
23
24
language: node_js
node_js: "12.14.0"
cache:
directories:
- node_modules
install:
- npm i
script:
- npm run build
after_script:
- git clone https://github.com/${RepName} .temp
- cd .temp
- git checkout gh-pages
- cd ../
- mv .temp/.git dist
- cd dist
- git config user.name "${UserName}"
- git config user.email "${UserEmail}"
- git add .
- git commit -m "Build & Deploy by Travis CI"
- git push --force --quiet "https://${GithubToken}@github.com/${RepName}" gh-pages:${D_BRANCH}
branches:
only:
- master
  • Git提交更改并push
1
2
3
git add .
git commit -m "create .travis.yml"
git push
  • 仓库更新后,
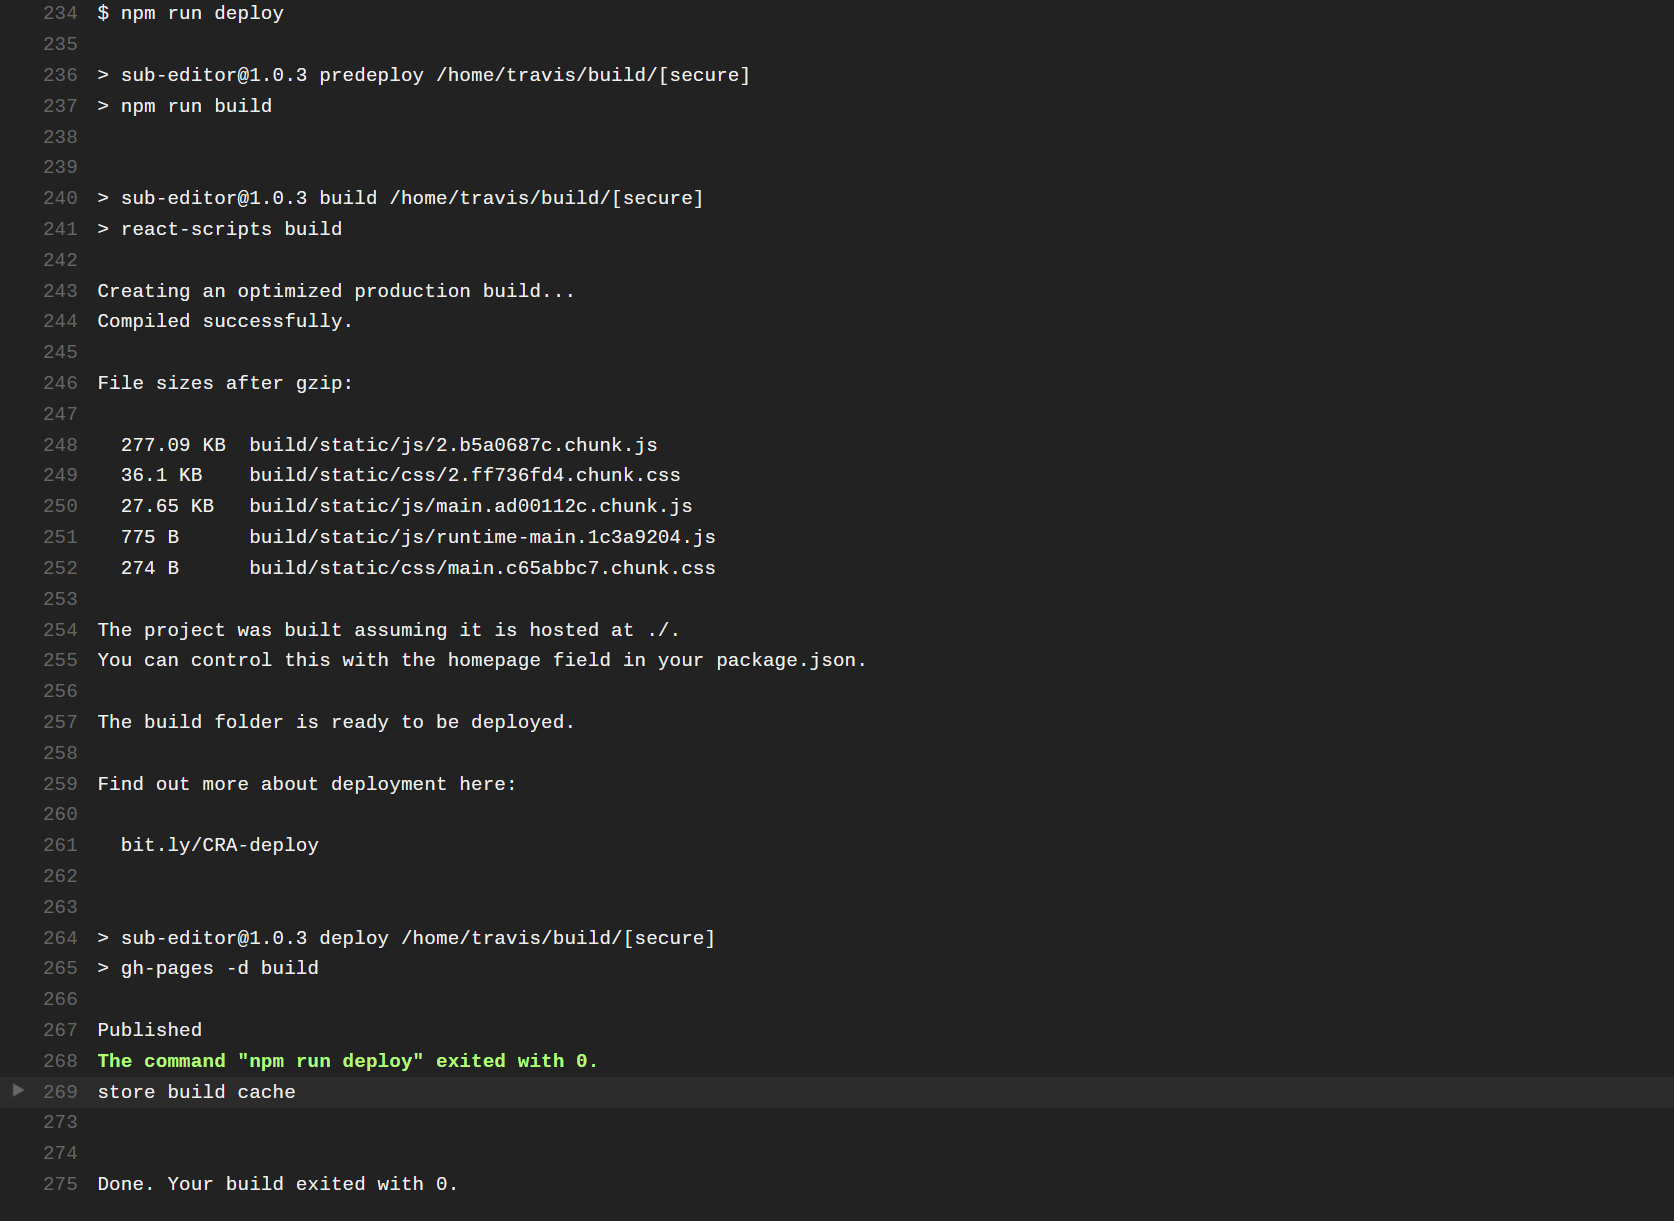
Travis会自动构建,查看build日志