全局唯一id生成器封装

UidGenerator的封装

UidGenerator是百度的开源id生成器,java实现,基于Snowflake算法。

Snowflake算法描述:

指定机器 & 同一时刻 & 某一并发序列,是唯一的。据此可生成一个64 bits的唯一ID(long)。

UidGenerator源码

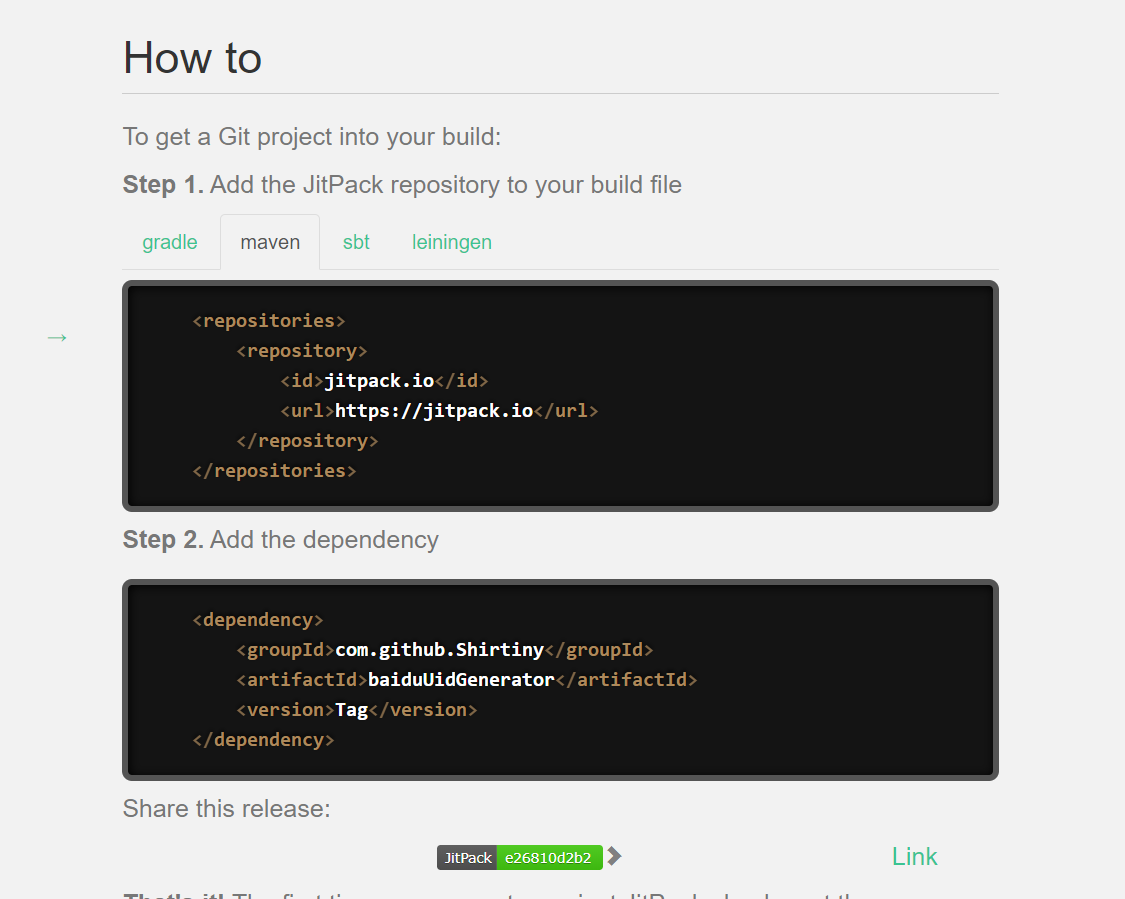
集成只需要按照文档做,借助jitpack提供的服务,在Maven中引入即可使用。

使用

先提前把结果写在这,这是一个我封装好的starter:

  • pom添加
1
2
3
4
5
6
7
8
9
10
11
12
13
14
15
16
17
18
19
20
21
22
23
<!-- mybatis-plus-->
<dependency>
<groupId>com.baomidou</groupId>
<artifactId>mybatis-plus-boot-starter</artifactId>
<version>3.2.0</version>
</dependency>
<!--唯一id生成器-->
<dependency>
<groupId>com.github.Shirtiny</groupId>
<artifactId>baiduUidGenerator</artifactId>
<version>e26810d2b2</version>
</dependency>
<!-- 工具包 Apache Commons-->
<dependency>
<groupId>commons-collections</groupId>
<artifactId>commons-collections</artifactId>
<version>3.2.2</version>
</dependency>
<dependency>
<groupId>commons-lang</groupId>
<artifactId>commons-lang</artifactId>
<version>2.6</version>
</dependency>
1
2
3
4
5
6
<repositories>
<repository>
<id>jitpack.io</id>
<url>https://jitpack.io</url>
</repository>
</repositories>
  • 数据库建表
1
2
3
4
5
6
7
8
9
10
11
12
13
DROP TABLE IF EXISTS WORKER_NODE;
CREATE TABLE WORKER_NODE
(
ID BIGINT NOT NULL AUTO_INCREMENT COMMENT 'auto increment id',
HOST_NAME VARCHAR(64) NOT NULL COMMENT 'host name',
PORT VARCHAR(64) NOT NULL COMMENT 'port',
TYPE INT NOT NULL COMMENT 'node type: ACTUAL or CONTAINER',
LAUNCH_DATE DATE NOT NULL COMMENT 'launch date',
MODIFIED TIMESTAMP NOT NULL COMMENT 'modified time',
CREATED TIMESTAMP NOT NULL COMMENT 'created time',
PRIMARY KEY(ID)
)
COMMENT='DB WorkerID Assigner for UID Generator',ENGINE = INNODB;
  • 配置数据库连接
1
2
3
4
spring.datasource.url=xxx
spring.datasource.username=xxx
spring.datasource.password=xxx
spring.datasource.driver-class-name=com.mysql.jdbc.Driver
  • mapper扫描
1
2
3
4
5
6
7
8
9
10
11
12
13
package cn.shirtiny.community.SHcommunity;
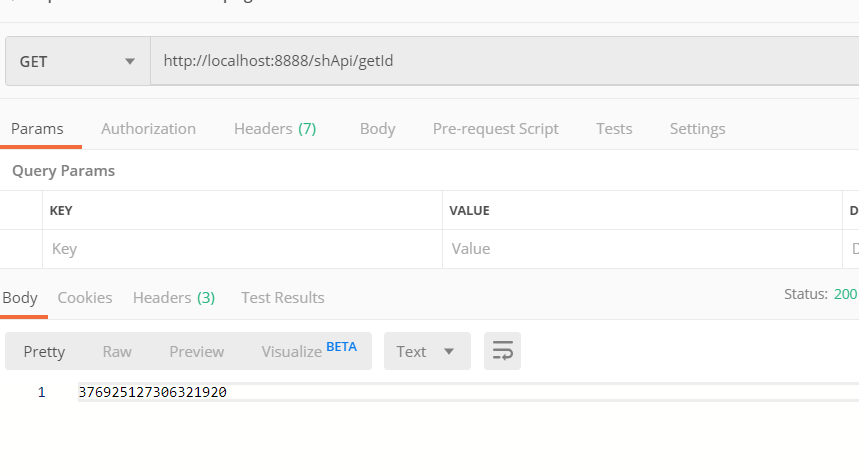
import ...

@SpringBootApplication
@MapperScan({"com.baidu.fsg.uid.worker.dao"})
public class CommunityApplication {

public static void main(String[] args) {
SpringApplication.run(CommunityApplication.class, args);
}

}
  • 以上配置完成后,直接注入使用即可。
1
2
@Autowired
private UidGenerateService uidGenerateService;
1
2
3
4
5
@GetMapping("/shApi/getId")
public String test() {
long id = uidGenerateService.generateUid();
return String.valueOf(id);
}

封装

  • 配置文件,用默认的即可cached-uid-spring.xml
1
2
3
4
5
6
7
8
9
10
11
12
13
14
15
16
17
18
19
20
21
22
23
24
25
26
27
28
29
30
31
32
33
34
35
36
37
38
39
40
41
42
43
44
45
46
47
<?xml version="1.0" encoding="UTF-8"?>
<beans xmlns="http://www.springframework.org/schema/beans" xmlns:xsi="http://www.w3.org/2001/XMLSchema-instance"
xsi:schemaLocation="
http://www.springframework.org/schema/beans http://www.springframework.org/schema/beans/spring-beans-3.1.xsd">

<!-- UID generator -->
<bean id="disposableWorkerIdAssigner" class="com.baidu.fsg.uid.worker.DisposableWorkerIdAssigner" />

<bean id="cachedUidGenerator" class="com.baidu.fsg.uid.impl.CachedUidGenerator">
<property name="workerIdAssigner" ref="disposableWorkerIdAssigner" />

<!-- 以下为可选配置, 如未指定将采用默认值 -->
<!-- Specified bits & epoch as your demand. No specified the default value will be used -->

<!-- 2^28 /(365*24*60*60) = 8年多 -->
<property name="timeBits" value="28"/>
<!-- 最多支持2^22 4194304 次机器启动 -->
<property name="workerBits" value="22"/>
<!-- 每秒支持2^13 8192个并发 -->
<property name="seqBits" value="13"/>
<property name="epochStr" value="2019-08-01"/>

<!-- 以下为可选配置, 如未指定将采用默认值 -->
<!-- RingBuffer size扩容参数, 可提高UID生成的吞吐量. -->
<!-- 默认:3, 原bufferSize=8192, 扩容后bufferSize= 8192 << 3 = 65536 -->
<!--<property name="boostPower" value="3"></property>-->

<!-- 指定何时向RingBuffer中填充UID, 取值为百分比(0, 100), 默认为50 -->
<!-- 举例: bufferSize=1024, paddingFactor=50 -> threshold=1024 * 50 / 100 = 512. -->
<!-- 当环上可用UID数量 < 512时, 将自动对RingBuffer进行填充补全 -->
<!--<property name="paddingFactor" value="50"></property> -->

<!-- 另外一种RingBuffer填充时机, 在Schedule线程中, 周期性检查填充 -->
<!-- 默认:不配置此项, 即不实用Schedule线程. 如需使用, 请指定Schedule线程时间间隔, 单位:秒 -->
<!--<property name="scheduleInterval" value="60"></property>-->

<!-- 拒绝策略: 当环已满, 无法继续填充时 -->
<!-- 默认无需指定, 将丢弃Put操作, 仅日志记录. 如有特殊需求, 请实现RejectedPutBufferHandler接口(支持Lambda表达式) -->
<!--<property name="rejectedPutBufferHandler" ref="XxxxYourPutRejectPolicy"></property>-->

<!-- 拒绝策略: 当环已空, 无法继续获取时 -->
<!-- 默认无需指定, 将记录日志, 并抛出UidGenerateException异常. 如有特殊需求, 请实现RejectedTakeBufferHandler接口(支持Lambda表达式) -->
<!--<property name="rejectedPutBufferHandler" ref="XxxxYourPutRejectPolicy"></property>-->

</bean>

</beans>
  • 新建UidGeneratorConfig类,引入上面的xml文件
1
2
3
4
5
6
7
8
9
10
11
package com.baidu.fsg.uid.config;


import org.springframework.context.annotation.Configuration;
import org.springframework.context.annotation.ImportResource;


@Configuration
@ImportResource(locations = { "classpath:config/cached-uid-spring.xml" })
public class UidGeneratorConfig {
}
  • 编写Service,这里简单封装下即可,有需要可以再改。
1
2
3
4
5
6
7
8
9
10
11
12
13
14
15
16
17
package com.baidu.fsg.uid.service;

import com.baidu.fsg.uid.UidGenerator;
import org.springframework.stereotype.Service;

import javax.annotation.Resource;

@Service
public class UidGenerateService{

@Resource
private UidGenerator uidGenerator;

public long generateUid() {
return uidGenerator.getUID();
}
}
  • 使用META-INF/spring.factories文件来实例化UidGenerateService
1
2
3
org.springframework.boot.autoconfigure.EnableAutoConfiguration=\
com.baidu.fsg.uid.config.UidGeneratorConfig,\
com.baidu.fsg.uid.service.UidGenerateService

使用Jitpack

官网

先注册个账号,直接用github授权就可以了,然后把github上的项目地址贴在这:

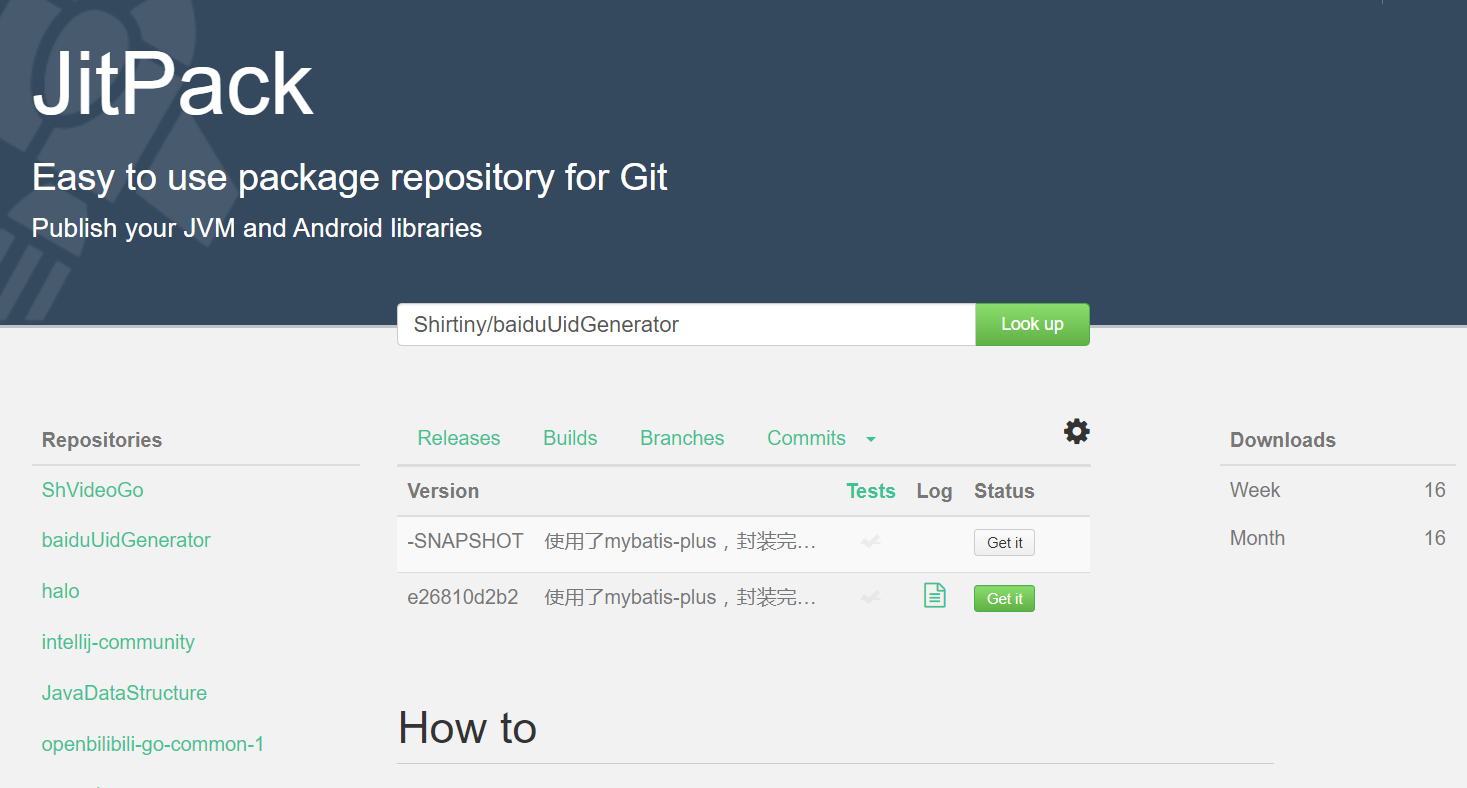
然后根据提示就行了,用法在这份md的开头写了。