MyBatis-Plus快速上手
MyBatis-Plus是针对MyBatis的增强方案,别人造好的车轮,我们甚至SQL语句都不用写了,分页也是自动完成的。
官宣图:

话说这些技术有各种动物,还挺有趣的。
相关依赖
1 | <!--数据源 --> |
基础配置
- 数据库基础
1 | #数据库基础配置 |
- 使用连接池时
1 | # DataSource Config |
- mybatis-plus的配置
MapperXml,如果需要的话
1 | mybatis-plus.mapper-locations=classpath:/mapper/*Mapper.xml |
配置类
1 |
|
如果没有什么配置需要的话,直接在启动类加个@MapperScan注解就行了:
1 | package cn.shirtiny.community.SHcommunity; |
Mapper接口
甚至什么都不用写
1 | package cn.shirtiny.community.SHcommunity.Mapper; |
- ok,没错,能用了,直接调用mapper接口的方法就能操作数据库了。
如何分页
因为之前常用的是PageHelper,翻了翻Mybatis-Plus的文档,试了下,发现比PageHelper更方便,当然,因人而异。
- Mybatis-Plus内置分页插件的使用方式:
首先在刚刚Mybatis-Plus的配置类里添加:
1 |
|
我的配置类
1 | package cn.shirtiny.community.SHcommunity.Config; |
- 然后就可以用了
- 直接调用mapper接口的
selectPage()方法即可,如:
1 | //null是查询条件为空,page是mybatis-plus提供的Page类 |
- 实际使用:
1 | //分页展示首页的帖子 |
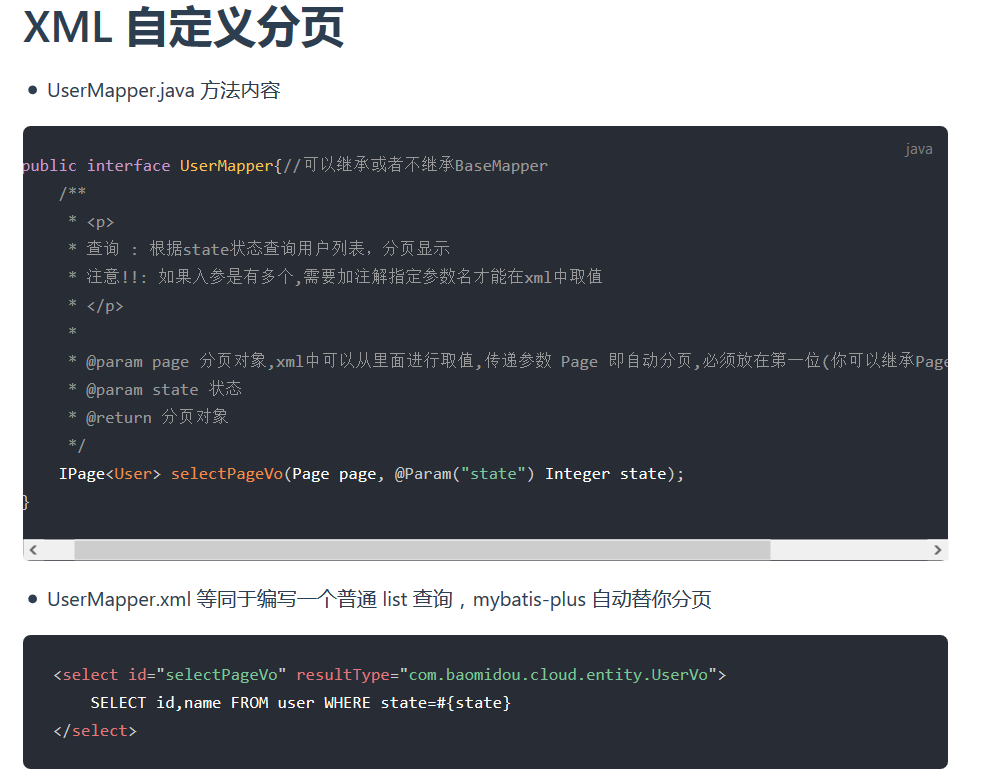
自定义分页
有时候我们需要自定sql语句,还想要分页,这方面的需求也是常有的。
其实很简单,你只需要在方法形参传入Page,返回Ipage即可,mybatis-plus自动帮你分页,比如:
1 | package cn.shirtiny.community.SHcommunity.Mapper; |
官方的描述:
注解
说一下基本使用,详细请查阅官方文档
类对应的表名,如:
1 | ("comment") |
标识域为数据库表主键id,可设置id类型(数据库自增或无状态等),如:
1 | (value = "comment_id",type = IdType.AUTO) |
非主键字段,可以指定字段名、是否为数据库表字段,插入时是否允许为空等,如:
1 | (value = "reviewer_id",insertStrategy = FieldStrategy.NOT_NULL) |
基本的模型如:
1 | package cn.shirtiny.community.SHcommunity.Model; |